
Mixed media nail tutorial by Elena Maltseva: eye nail art
By Guest Writer | 21 February 2026 | Art & Technique

Scratch explores how award-winning nail artist & educator, Elena Maltseva, created the nails for the Nailympia 2026 marketing campaign…
I want to demonstrate how to create the human eye, because it is one of the most important elements on a person’s face. I begin my face sculpting workshops with the creation of the human eye as a basic element. The eye is the mirror of the soul, and the emotion conveyed by its gaze can communicate the character and feeling of a subject.
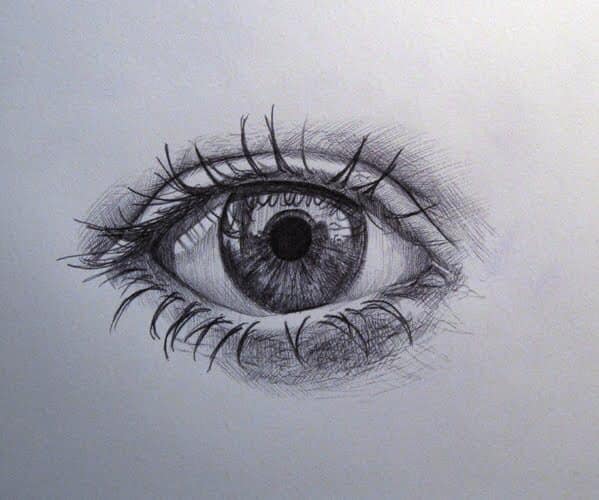
When honing this skill, start with reference images. It’s better if these are hand-drawn pictures or pencil sketches.
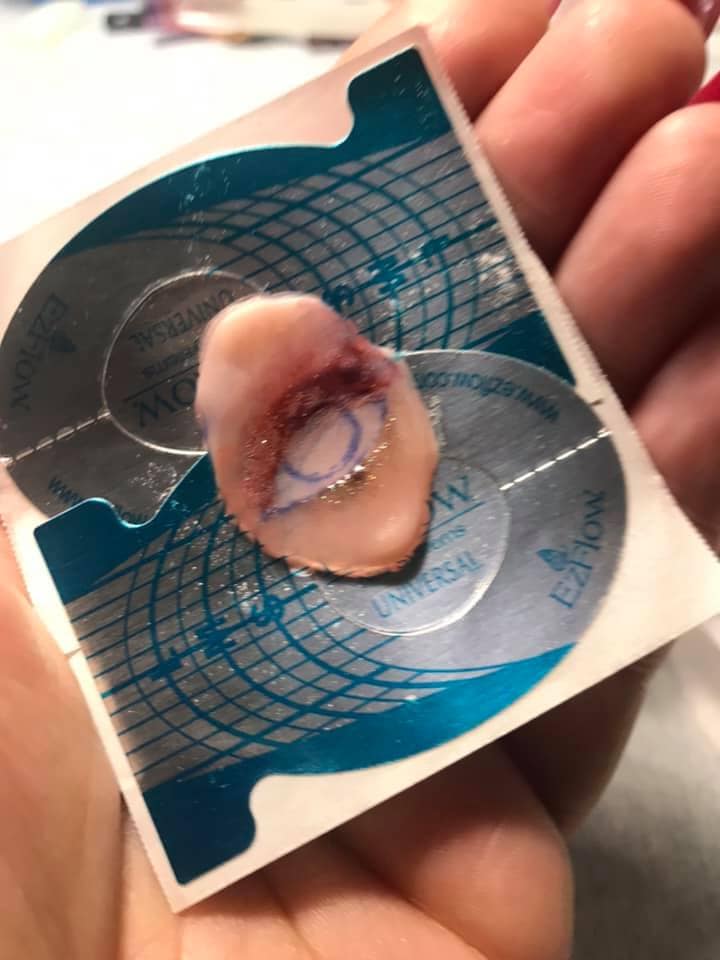
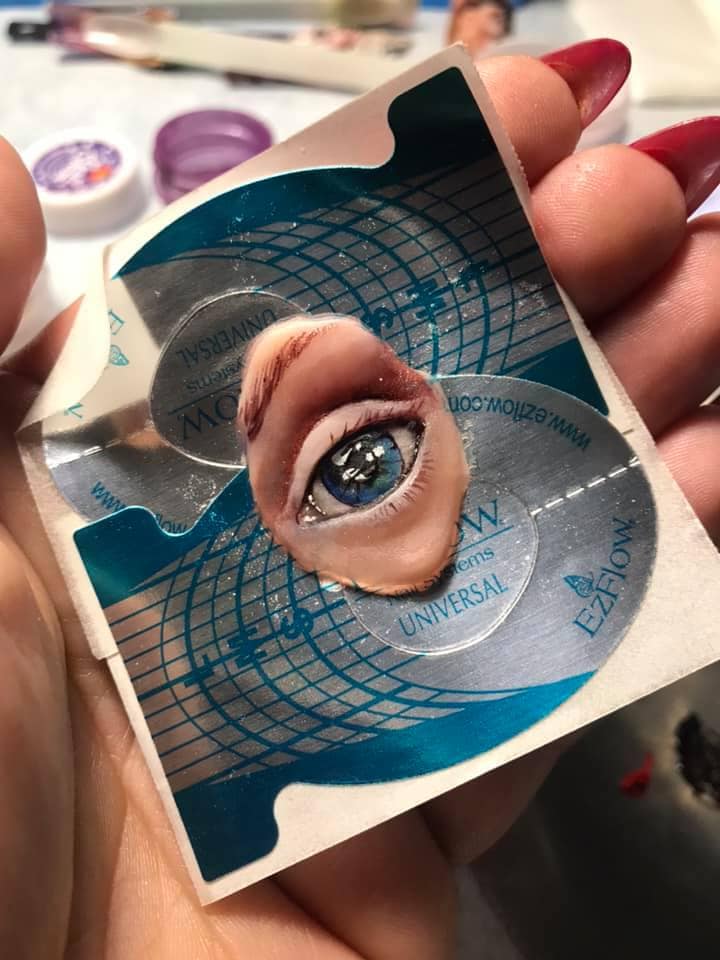
Step 1
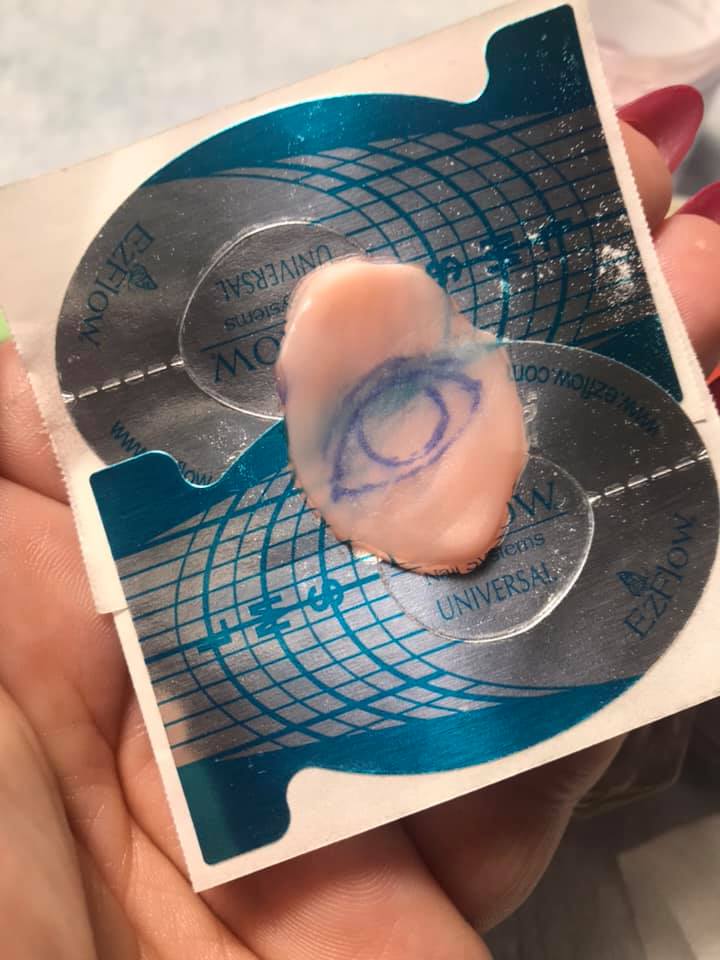
Use acrylic in flesh, nude tones to create the section of the face where the eye will be located. After the base is created, outline the location, size and shape of the eye.
Step 2
Using shades that convey a shadow effect, such as browns, greys and lilacs, define the upper eyelid area. You can also use lighter shades, possibly with shimmer, to define the lower eyelid area and emphasise the perimeter of the eye.
Step 3
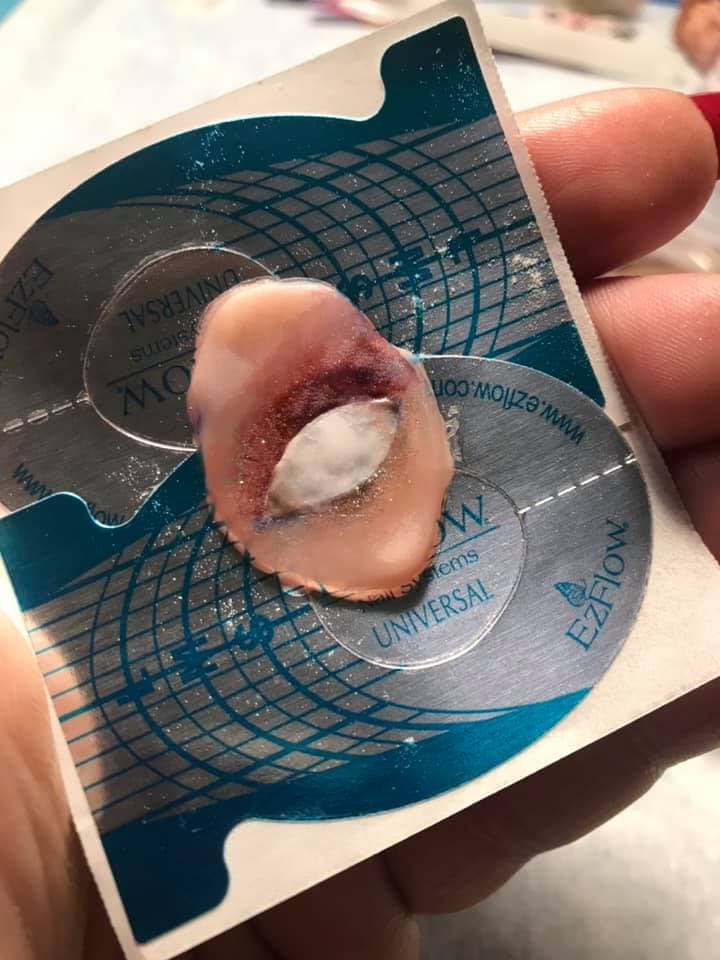
Now highlight the white of the eye. For this, use white acrylic paint and apply a thin layer over the entire inner part of the eye/the eyeball.
Step 4
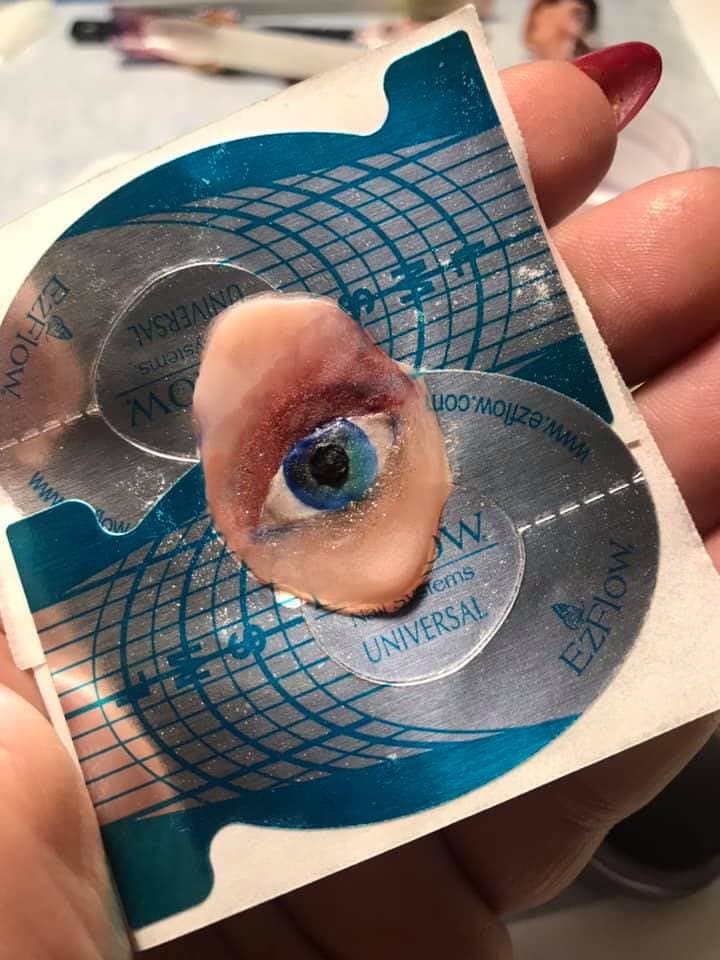
Create the iris. Here’s where you can play with colour. It’s best to use three shades that sit together on the colour wheel. For example, blue, light blue and turquoise. Another combination would be brown, terracotta and orange. A third, more striking combination is olive, brown and turquoise. Use a lighter shade of shadow to highlight the inner and outer corners of the eye.
Step 5
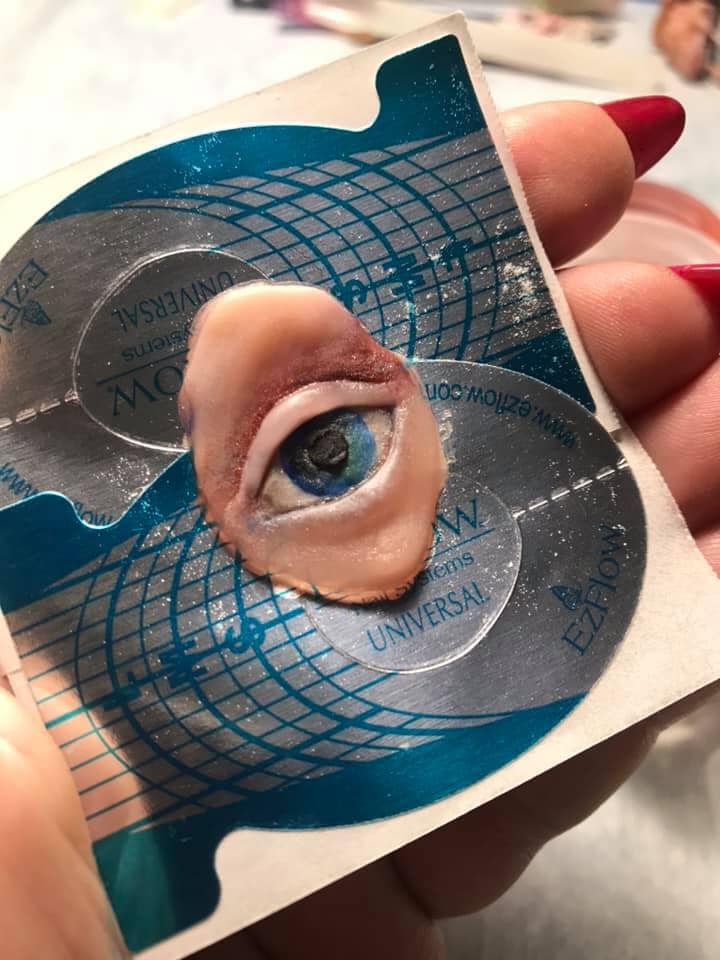
Highlight the upper and lower eyelids using nude shades. You can also use clear or pink acrylic to create volume, without making the eyelids appear too thick. You can also add subtle highlights using white acrylic on the edges of the upper eyelid and lower eyelid. Apply a subtle, semi-transparent grey shade under the upper eyelid.
Are you enjoying this content?
Join our community to receive more like this
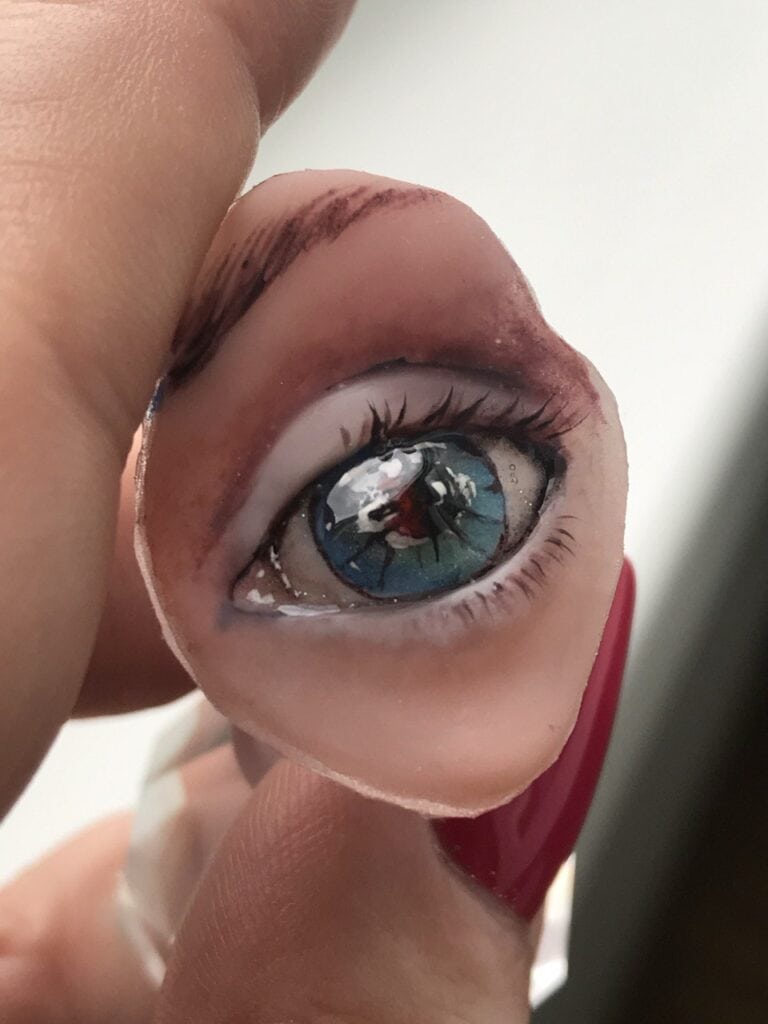
Step 6
Now you can begin working with gel paints. These can be used to accentuate the perimeter of the eyelids, create playful effects within the iris and convey iridescent highlights. A white shade should be used for the final highlights.
Eyebrows are also very important: avoid making them too dark – instead, layer lighter brown shades. Start by using lighter strokes, then add more intense ones as you build the design.
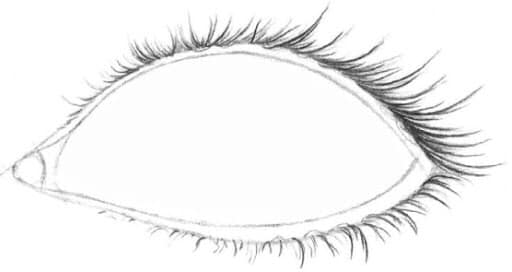
How to create eyelashes
Step 1
You’ll notice that the eyelashes seem to be in the air. The secret to this effect is a thin layer of clear acrylic and a matte gel polish no-cleanse top coat between the eyelid and lashes. Don’t create too many lashes, and don’t paint them too close together, too parallel or too thickly. Your brush strokes should move from thick to thin.
Step 2
Eyelashes should not only be created with black. The first layer of lashes should be lighter, and only after that should you add a little bit of black. The eyelashes should not be too long or too thick. Remember the golden rule that less is more!
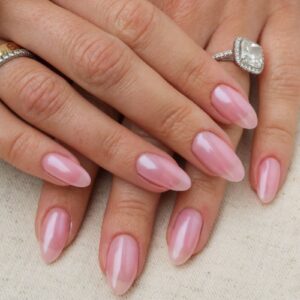
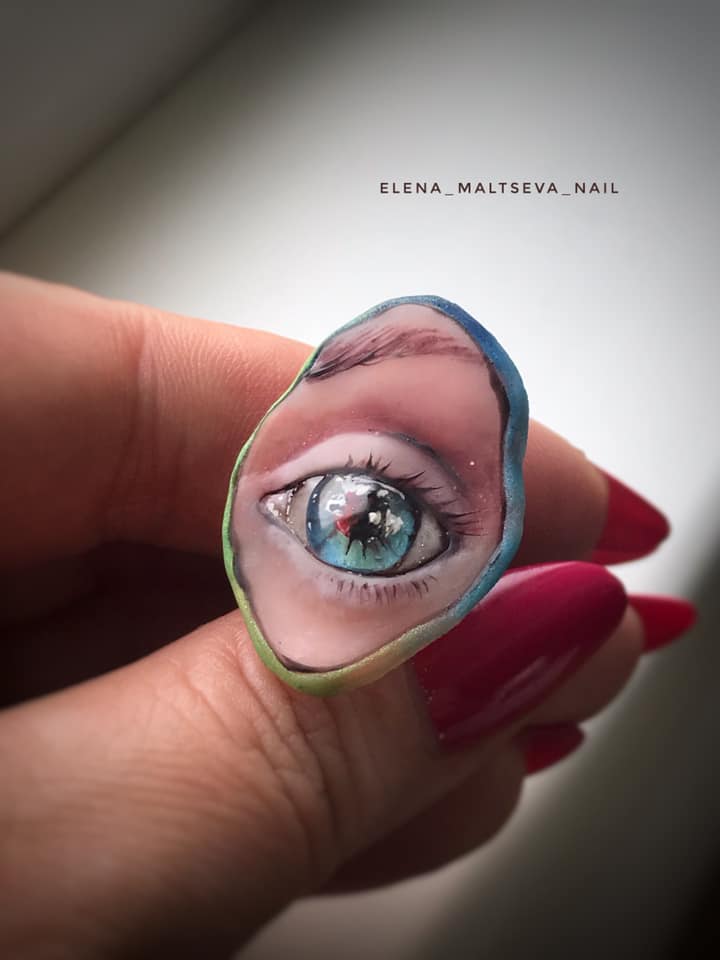
Here’s the final result…
Follow Elena on Instagram: @elena_maltseva_nail