Easter chick nail art step-by-step

Seasonal & Occasions, Step by Step
Hara Professional brand ambassador, Katie Lou Pritchard (@katielou_nailartist_educator), brings spring to the fingertips with this irresistibly cute Easter nail design.
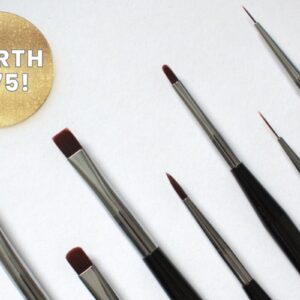
You will need the following Hara Professional products, available via www.astonandfincher.co.uk:
Are you enjoying this content?
Join our community to receive more like this
- Ultra Bond Primer.
- Base Coat.
- Gel Polishes in Sea Shell; Cinque Terre; Daffodil; Peach Bloom; Dusty Rose; Ebony; Procida; Burano & Amalfi Coast.
- Detailer Gel Brush.
- Liner Brush.
- Black Eggshell Top Coat.
- Matte Top Coat.
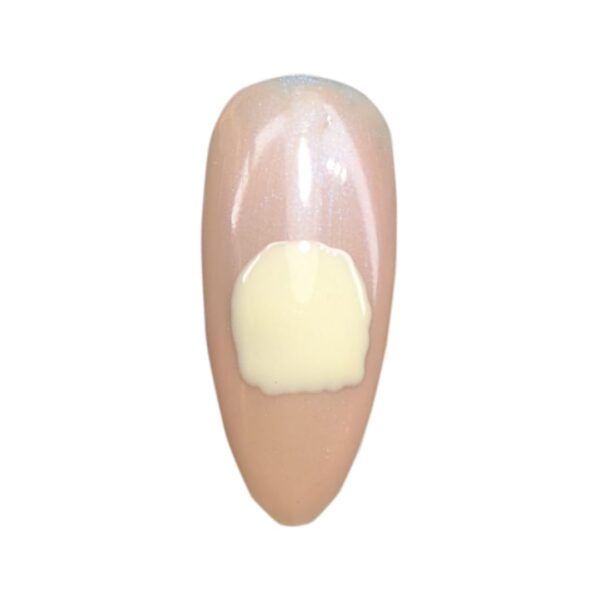
Step 1
Prep the nail. Apply Ultra Bond Primer followed by Base Coat. Cure. Paint a layer of Gel Polish in Sea Shell to create a soft nude base. Cure.
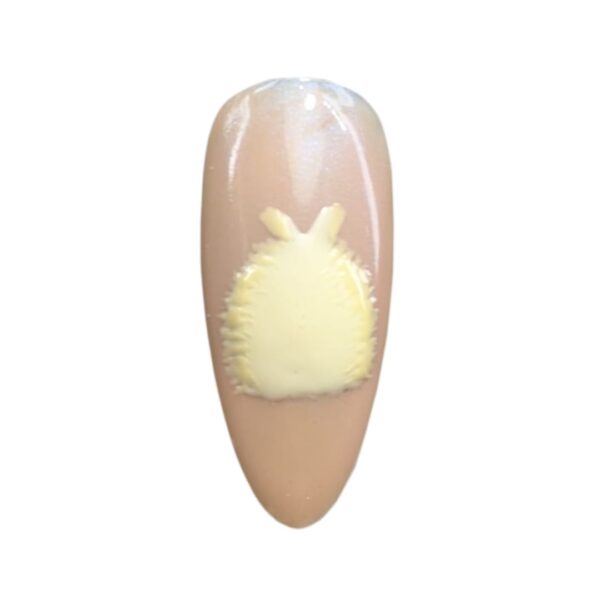
Step 2
Using the Detail Tool, apply Gel Polish in Cinque Terre in a roughly circular shape to form the chick’s head. Perfection isn’t required. Do not cure.
Step 3

Gently feather out the edges of the uncured gel polish with the Pro Liner Brush to create a soft, fluffy texture. Cure.
Step 4
Lightly layer Gel Polish in Daffodil over the textured edges to enhance depth. Cure.
Step 5
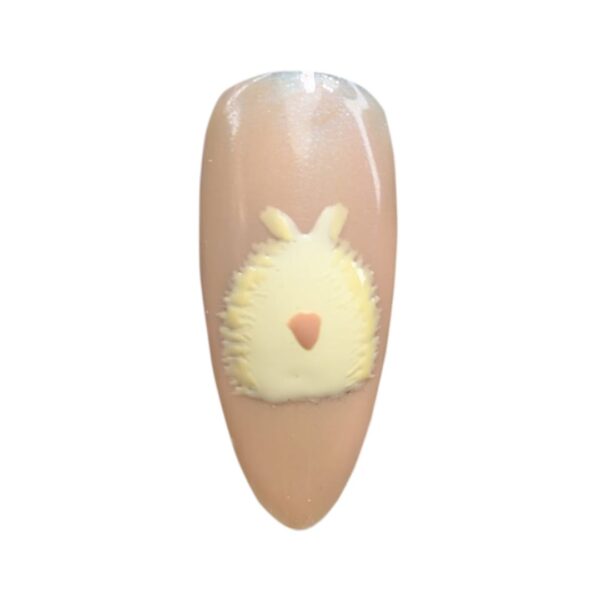
Mix the Peach Bloom and Dusty Rose Gel Polishes, and use the Pro Detailer Brush to paint a small triangle for the chick's beak. Cure.
Step 6
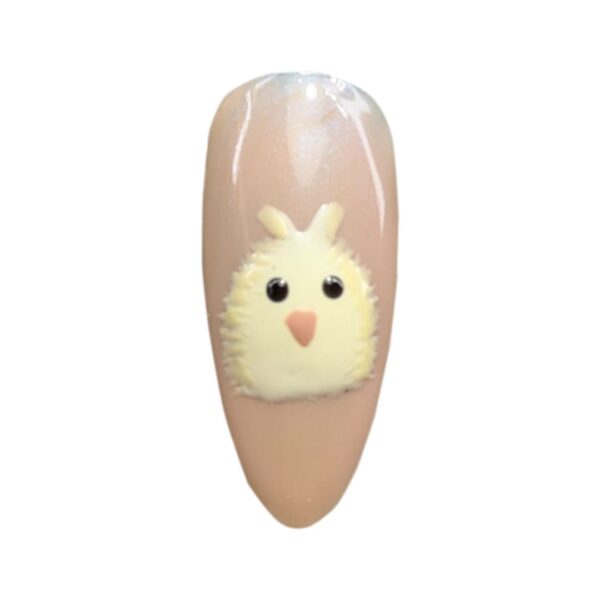
Using the Detail Tool and Gel Polish in Ebony, apply two small dots on either side of the beak to form the eyes. Cure.
Step 7
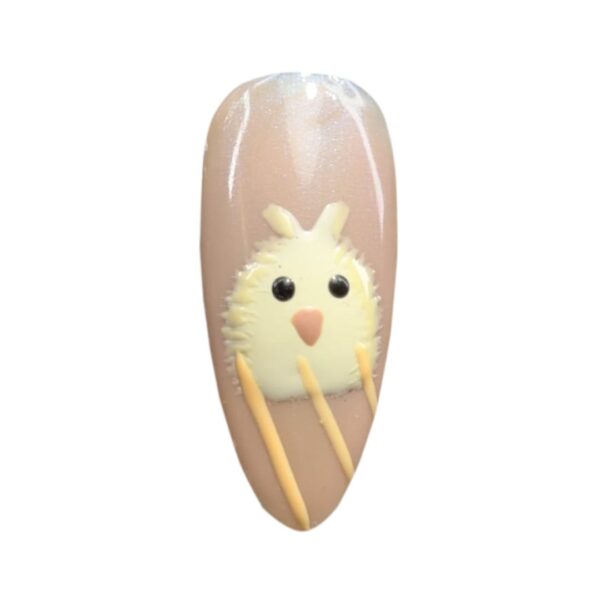
Paint three diagonal lines underneath the chick using Gel Polish in Procida. Do not cure.
Step 8
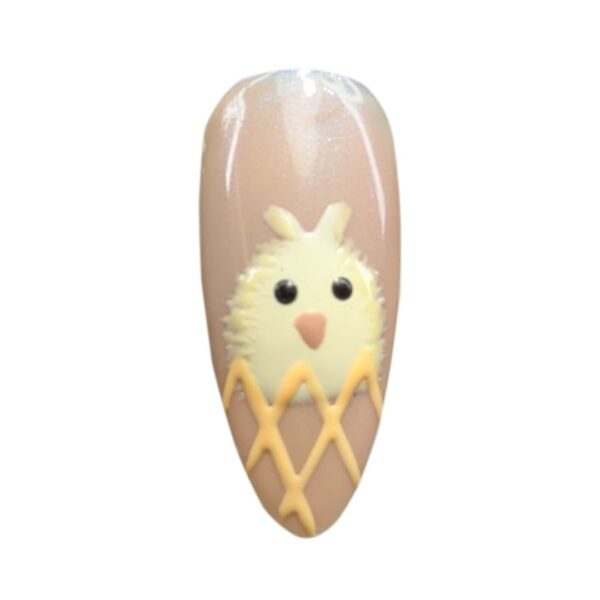
Then add three diagonal lines in the opposite direction to create a cracked egg effect. Do not cure.
Step 9

Fill in the shape to complete the cracked egg design. Cure.
Step 10
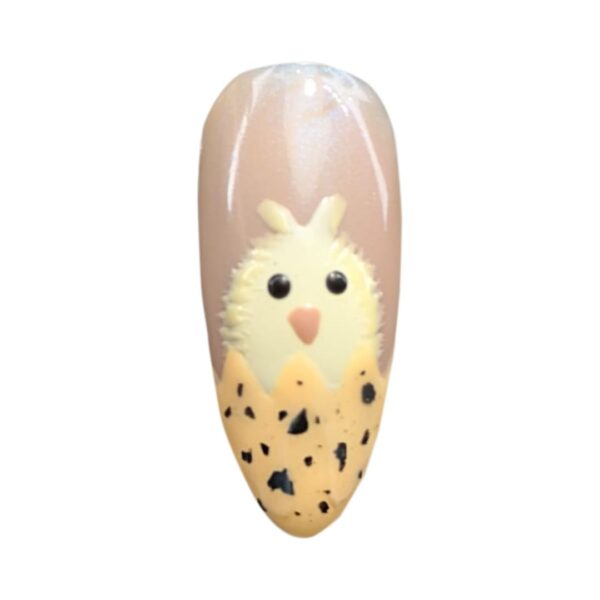
Apply Black Eggshell Top Coat over the egg to achieve a speckled finish. Cure.
Step 11
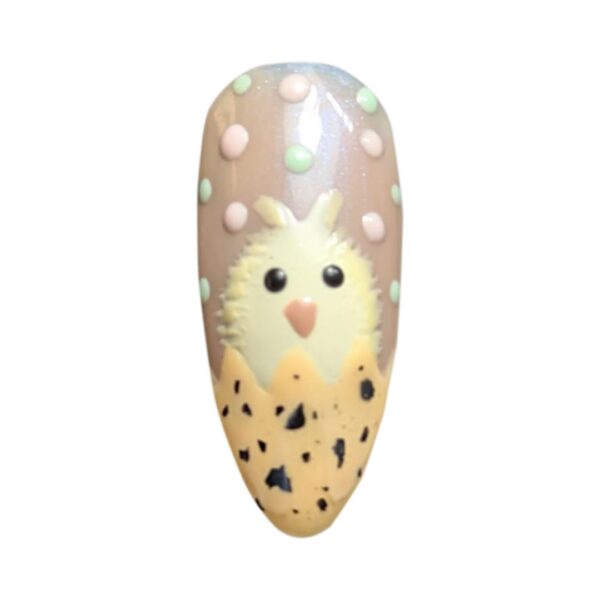
Use Gel Polishes in Burano and Amalfi Coast to paint pastel polka dots on the background of the style. Cure.
Step 12
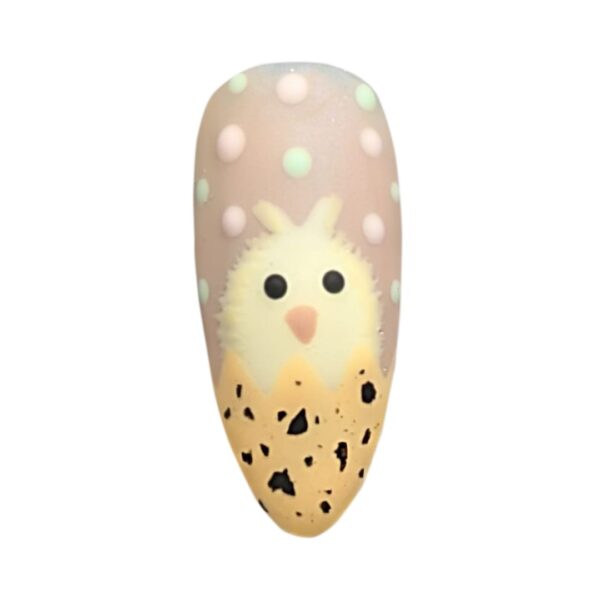
Seal the look with Matte Top Coat and cure.