Easter chick nails

Seasonal & Occasions, Step by Step
Celebrate Easter with these cute chick nails by Natalia Zduniuk, F.O.X Nails UK brand ambassador.
Are you enjoying this content?
Join our community to receive more like this
Step 1
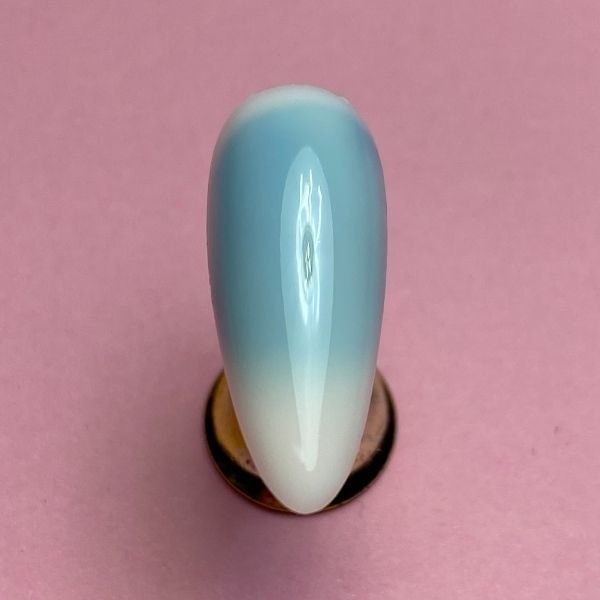
Prep the nail, apply base coat and cure. Apply a blue gel polish shade around the centre of the nail and cure, followed by a milky gel polish shade. Cure.
Step 2
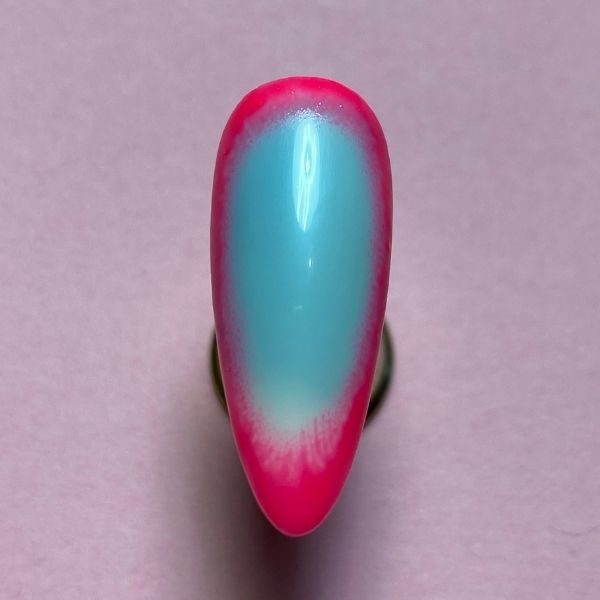
Frame the nail using a pink gel polish shade and create a gradient toward the centre using an ombré brush. Cure.
Step 3
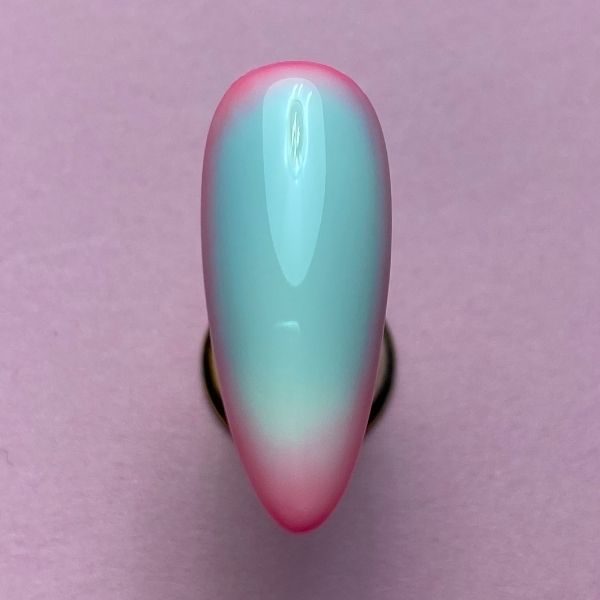
Paint over the entire nail with a milky gel polish and cure.
Step 4
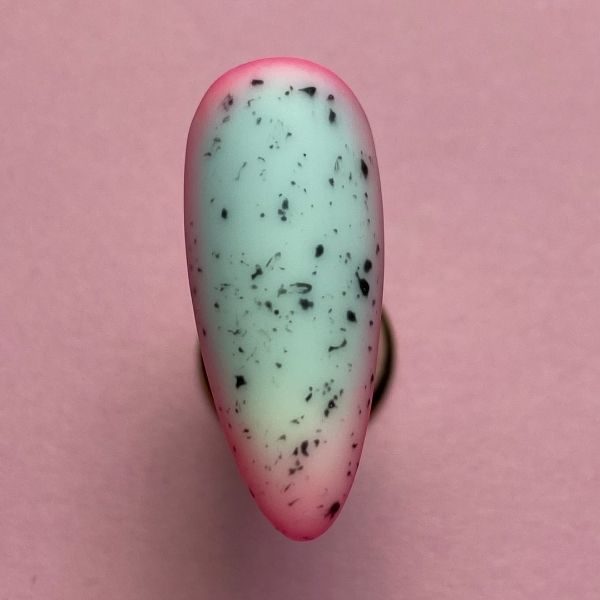
Using a fanned brush dipped in black gel polish, create speckles across the nail and cure. To finish here, apply a matte top coat and cure.
Step 5
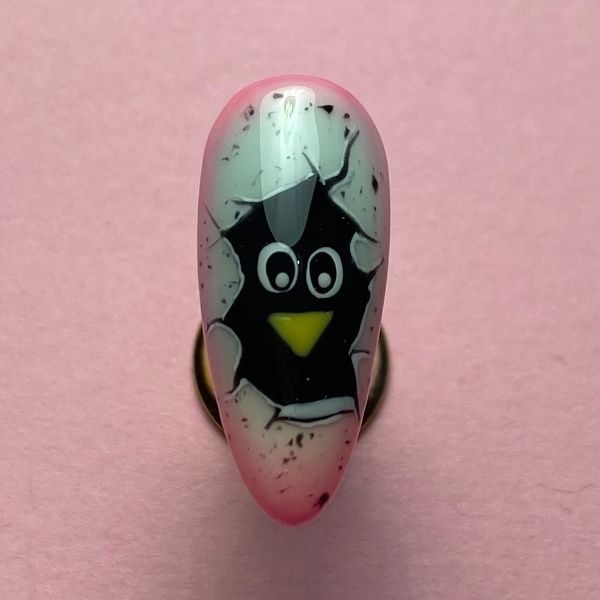
Use black gel polish and a nail art brush to create a ‘cracked’ background. Once cured, paint eyes and a beak and cure. Outline the cracks using white gel polish to accentuate. Complete the design with a glossy top coat and cure.