6-step floral nail art tutorial for blooming beautiful fingertips

Floral, Spring/Summer, Step by Step
Scratch online columnist, session nail stylist & salon owner, Marie-Louise Coster, shares a step-by-step guide to a stylish spring nail design, created using gel polish.
Are you enjoying this content?
Join our community to receive more like this
You will need:
- Nude or pink gel polish (for the base).
- Gel polishes in a variety of shades (for the flowers).
- Green gel polish – in various hues (for the stems and leaves).
- Yellow, black and white gel polishes (for the bee).
- Dotting tool.
- Fine liner nail art brush.
- Gel polish top coat.
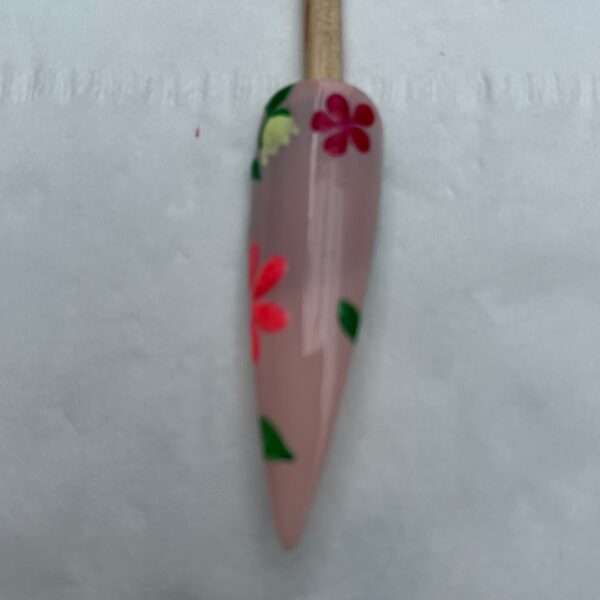
Step 1
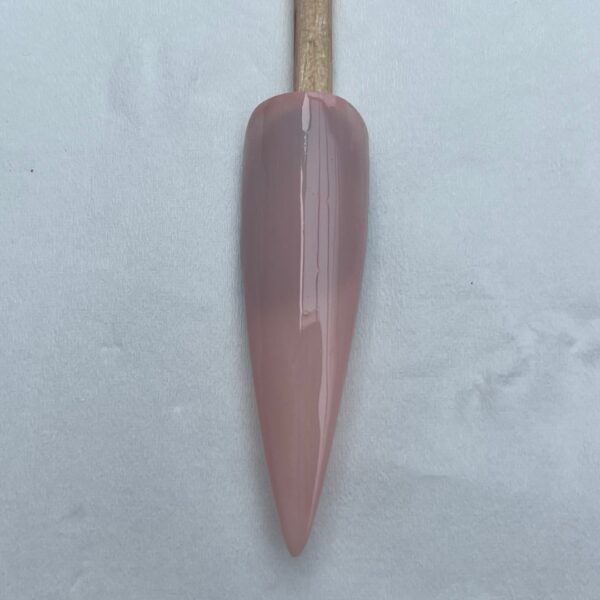
After prepping the nail, paint the base of the design using two coats of nude or pink gel polish. Cure after each layer.
Step 2
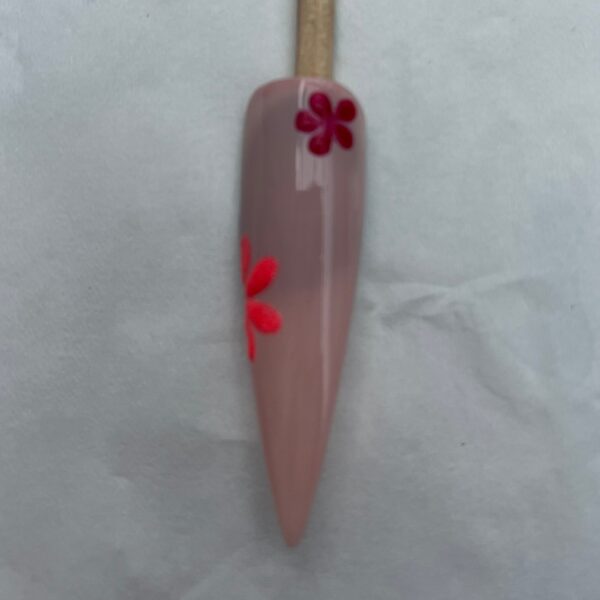
I started by painting a small flower in the top right-hand corner of the nail. Use a dotting tool to create five gel polish dots in a circle, then drag each dot towards the centre of the circle using a fine liner brush. Once you are happy with the flower, cure. Add an incomplete flower to the left-hand side of the nail. Create this is the same way as the previous flower, but drag the dots towards the outer edge of the nail. Cure once happy.
Step 3
Add a daffodil-style flower by painting a semicircle gel polish shape. Where the straight edge is, create a slightly jagged effect, then cure. Next, use green gel polish to add some leaves, placing these randomly around the flowers and on the edge of the nail. Cure.
Step 4
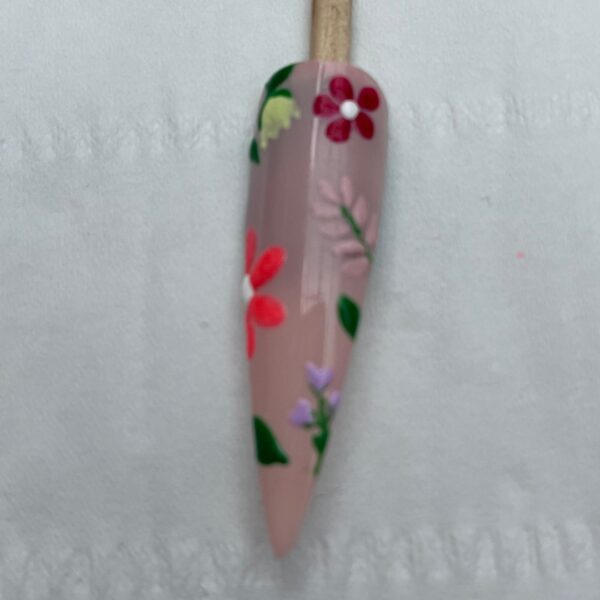
To create the lilac flowers, use a dotting tool. Add two gel polish dots next to each other, then with a fine liner brush, drag the dots down toward a point to create a heart shape. Do this three times - once for each bud - and cure. Connect the three buds with a green gel polish stem, and add leaves to this if you wish before curing. Use a green gel polish and fine liner brush to paint a diagonal line on the right-hand side of the nail. Cure, before using another gel polish shade to add seven leaf-style shapes on each side of the green line. Cure. Use a dotting tool and white gel polish to add a centre to your first two flowers, then cure.
Step 5
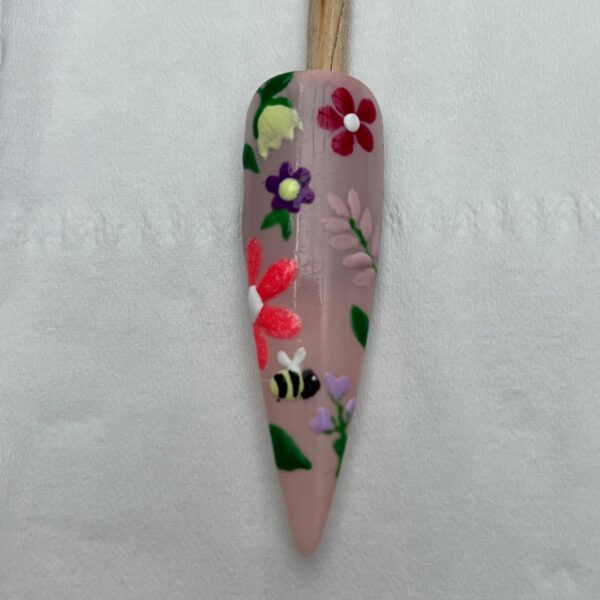
Start filling any gaps in the design with flowers of your choice. Paint a bee in one of the spaces, using a yellow gel polish to create a small oval. Cure, before painting a black gel polish head and stripes. Cure again. Finally, use white gel polish to paint two oval-shaped wings, and add a tiny dot for the eye. Cure.
Step 6
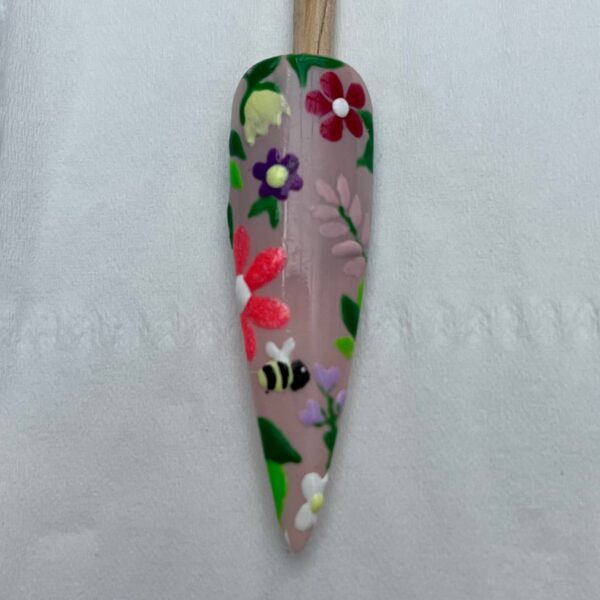
Fill in any remaining large gaps with more gel polish flowers, and add extra leaves using different shades of green gel polish. Cure. Float top coat over the design and cure to finish.